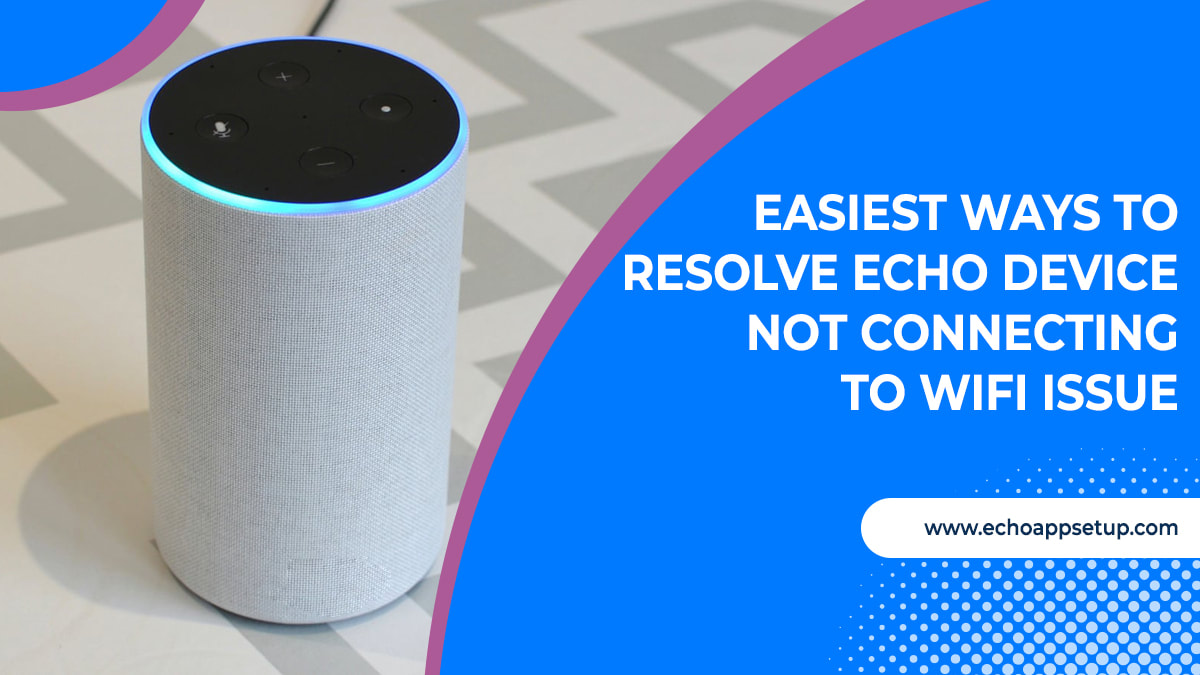
 Amazon Echo is a great little device that makes your life easier by fulfilling thousands of different requirements. But what can you do if your brand new Amazon Echo Device Is Having Wi-Fi Issues ? Without a solid internet connection, your Echo device will stop responding to processing commands and act as a traditional Bluetooth speaker. But with a bit of troubleshooting, you can fix the Echo device not connecting to the WiFi issue. In this blog, we will discuss the easiest way to fix the Echo device connectivity issue. Let’s get started.
How to fix Echo device not connecting to WiFi issue Following are the different ways to fix the Amazon Echo device not connecting to the WiFi network issues.
Step 1: First of all, launch the Alexa app connected with your Echo, and click on the “Devices” option. Step 2: Now, click on the “Echo and Alexa” option and then tap on the “Echo” option. Step 3: After this, you will be navigated to the “Echo device settings” page, where you can confirm your WiFi name under the WiFi network option. Step 4: To select the “forget a WiFi network” option, first you need to turn off the router, then change the password, followed by resetting the Echo device, and finally, start the Echo device setup process again.
Hopefully, these troubleshooting tricks will help you fix the Echo Device Is Having Wi-Fi Issues without any difficulty.
0 Comments
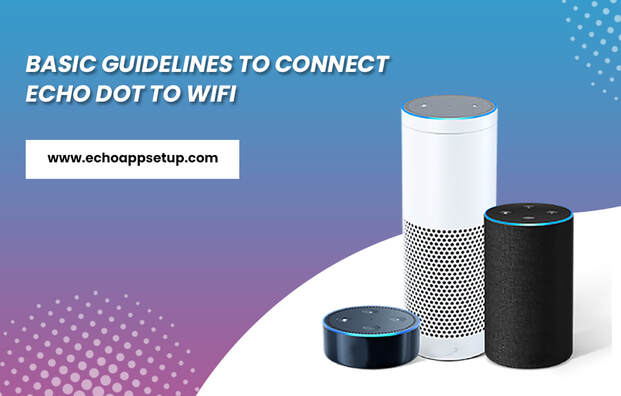 Have you purchased a brand new Echo dot device? Want to learn how to Connect Echo Dot to WiFi? Well, if your answer is yes, then this blog is for you. In this blog, we are going to provide you with simple and easy guidelines to connect your Echo dot to WiFi. Once you are connected with WiFi, you can use your Echo dot device flawlessly. But before connecting the Echo dot to WiFi, make sure that you have the password of your WiFi network with you and also download and install the Alexa app on your device. So, without taking much time, let’s understand the process of connecting Echo dot to WiFi network.
Instructions to Connect the Echo dot to WiFi To connect your Echo dot to the WiFi network, you need to follow the below-mentioned steps: Step 1: First of all, you need to open your Alexa app and then go to the left navigation panel. From there, you need to select the settings option. Step 2: Then, from the settings options, you need to select the “Setup a new device” option. Step 3: In the next step, you need to press and hold the action button on your Echo device for 5 seconds until the ring light turns orange. Step 4: After that, you will see a list of all available wireless networks in your Alexa app. Step 5: Now, select your WiFi and enter the correct password to connect Echo dot to WiFi. If you are not able to find your wireless network in the list then scroll down and click on add a network button or rescan button. Step 6: In the next step, you need to add your Echo dot to the list of router’s approved devices. Then, scroll down to find the MAC address. Step 7: You can save the password in this step and then click on the connect button. Step 8: Finally, you will see a confirmation message on your screen. Steps to troubleshoot the common issues Echo users can face some WiFi issues when they are trying to connect their Echo dot to the WiFi. However, you can resolve these problems by following the below steps:
Hopefully, these instructions will help you to Connect Echo Dot to WiFi without any difficulty. All these instructions are easy to execute, but still, if you are facing any issue, please feel free to contact our technical experts.  Well, no doubt that Alexa is an excellent device but still users can face several issues like red ring light issues while using the Alexa device. Many of the users even don’t know about the red ring light issue and how it occurs. If you are a victim of the Alexa Echo Red Ring of Death issue then no need to be annoyed or being frustrated. This blog will help you to overcome the issue. We will guide you with some precise steps to fix Alexa Echo red ring of death issues. Keep reading the blog and follow the step-by-step instructions.
Easy guide to fix Alexa Echo red ring of death issues If you are encountering Alexa Echo red ring of death issues then follow the below solutions to resolve the issues:
Have you recently purchased a new Echo dot device? Struggling to know how to set up Echo dot 2nd generation? Don’t know how to set up your Amazon echo dot? Well, if the answer to the above questions is yes, then you have reached the right place. In this blog, you will get the step-by-step instructions that help you in setting up your Amazon echo dot without any hassle. Keep reading till the end of the blog and check out the simple steps to set up Echo dot. Let’s get started.
How to Set Up Echo Dot 2nd Generation? Look at the below steps to set up the Amazon Echo dot 2nd generation. You need to follow the below steps carefully to avoid errors during setup: Step 1: The first step is to download Alexa application from the Amazon Alexa app store on your device. Step 2: Once you install the Amazon Alexa app, connect your Echo speaker to the electrical outlet and wait for some time until it starts speaking with you. Step 3: When you open the app for the first time, the system will prompt you to sign in using the login credential details of the Amazon account. After that, you can connect with the Echo dot device. Step 4: Now, you have to wait for some time until the orange LED light starts blinking on your device. It indicates that your device is ready to set up. Step 5: Launch the Amazon Alexa app and then sign in to your account. Step 6: Once you logged in successfully to your account, you will see the horizontal bars at the left corner of the screen to open the main menu. Step 6: Hit on the Add device option. Step 7: Select the Amazon Echo from the displayed list. Step 8: Next, choose the Echo device that you want to set up. Step 8: Select the Amazon Echo Dot 2nd generation device option. Step 9: Open the Bluetooth so that your smartphone will find the device. Step 10: You need to choose your device from the displayed list. Step 11: In the next step, choose the wireless network with which you want to connect your Echo Dot device. Step 12: Once your Echo dot is connected to the WiFi network, tap on the continue button for customized settings. Step 13: Next, you can change the output if you want to connect your Echo dot to some other external speaker. Otherwise, you can proceed with the built-in speaker of Echo dot. Step 14: Choose the room where you want to place the Echo dot. On the home page, you will found an introduction video providing details on how to use Echo dot. Step 15: At last, click on the Next button to complete the Echo dot setup. That’s all! We hope by going through the above-mentioned instructions, you will get to know how to set up Echo dot 2nd generation. All the steps are simple to understand and follow but in case you found any difficulty in setup then you can contact our support team. Are you using the Echo dot device? Is your Echo dot stopped working? Facing various issues with your Echo device? If the answer to all the above questions is yes then don’t panic! You have reached the right spot. There are numerous reasons for which Echo dot has stopped working such as WiFi connection problem, internet outage, voice recognition issues, and many others. In this blog, we have described the step-by-step instructions for troubleshooting the Echo dot stopped working issue. Scroll down till the end of the blog and know the solutions to resolve the problems. Let’s get started.
Steps to Fix Echo Dot Stopped Working Issue Look at the below steps to resolve the Echo dot stopped working issue. You have to go through with all the steps to fix the issue: Method 1: Unplug Echo Dot The first method that is needed to perform to fix the Echo dot stopped working issue is to unplug the Echo dot. Here are the steps that need to follow:
Method 2: Check the Microphone Button The next step is to check the microphone. If your device is switched off then it will not respond to any voice command. Make sure that your microphone is power on. Press the power button. In case, it starts working then you will see that the power LED light starts blinking blue. If the red LED light is blinking then it means your Echo device is not working. Method 3: Restart the Echo Dot When your Echo dot is creating issues then try to restart your device. Follow the below steps to restart the Echo dot:
Method 4: Hard Reset the Echo Dot If the normal reset will not resolve the issue then try to do the hard reset on your device. It may help you in making your Echo dot works again. Here are the steps:
Congrats! By following the above-mentioned instructions, you can easily resolve the Echo dot stopped working issue. If you have any doubt or are unable to resolve the issue then you can take help from our professional technical experts through the live chat option. We heard your screams, ‘Alexa there was an error registering your device’ and so here we are. Amazon Alexa is everyone’s choice because who takes your orders that seriously, right? Well, like any other gadget, Alexa also comes with its problems. Amazon Alexa devices giving trouble while registering is a commonly faced issue by Alexa users. So, you will read about the reasons and how to troubleshoot this issue in this article. Let’s start with it;
Reasons Or Situations In Which Alexa Has Error Registering Your Device:- These are some of the situations in which you encounter the Alexa device not registering error. These can be the possible reasons for your problem, understand them to solve the issue;
Troubleshooting Tips To Resolve Alexa Registering The Device Error:- You may follow the troubleshooting tips mentioned below to resolve the registration issue of your Alexa device. These tips are quite easy to perform so you don’t need any technical expertise to perform them. Follow them carefully;
Alexa Just Got Registered! Your screams, ‘Alexa there was an error registering your device’ have been listened to and answered. Just make sure that your home wireless network is stable and active. Follow the troubleshooting tips carefully to resolve the error. That’s it you are sorted and now you can enjoy giving commands to your Amazon Alexa app.  The home automation tools have introduced major advancements in the life of humans. One of these amazing home automation innovations is the Echo Dot device. It offers convenience, flexibility, and an incredibly smart user experience with the customers. The recently released update can turn your Echo Dot into a great multimedia source with a built-in speaker upgrade. But, before you use the Echo service, you need to complete the device registration. Now, there are millions of users worldwide using Echo Dot to play music, find the weather reports, get news updates, and do a lot more other stuff. Although, problems like Echo Dot Registration Failure can occur and hamper the user experience. If you also fail to register your device, this post can help you. Here, we have shared some useful instructions that can help you with the registration failure issue. So, read on and proceed with the steps below to do the task:
Troubleshoot Echo Dot Registration Failure Error
Steps To Deregister Echo Dot
This will delete the previously registered account and now you can register it again and start using the services.
So, these are some simple troubleshooting guidelines that could help you with the Echo Dot Registration Failure error on your PC. The mentioned steps surely help you to fix the problem. But, if you still have a doubt or there is any other technical query regarding the Echo Dot registration, get in touch with the experts. The team of professionals is always available to help you, so contact them and find the most reliable solution to your problem.  If you want to run your Amazon Echo device efficiently, you need to download the latest version of Alexa app. Once you have downloaded the application on your smartphone and connected it to your Echo device, you can utilize the Alexa skills by giving the voice commands to your device. In this post, we are going to share the simple guidelines that can help you with the Amazon Alexa app download.
Smart services offered by Alexa app Alexa devices have a lot to offer. Amazon Alexa app can help children with their study, it can help you to perform different functions at your home, for example; you can ask Alexa to turn off or on the lights, she can play your favorite music, you can get weather updates, news, and sports updates, and a lot more. The result of the Alexa app and very reliable, you can trust the results shared by the application for your queries. You can have real-time updates and headlines from multiple news channels. If you are a book lover and fond of reading the stories, you can also install the audible skill on your Amazon Alexa application and device. If you do this, you can easily read and listen to the stories from your favorite storybooks whenever you want. There are a lot more skills that you can use to enhance your Alexa experience. You can add the skills according to your preferences and remove them using the application. Easy Guidelines to Download the Amazon Alexa App Downloading the Alexa app is a very simple and easy process. The app download is available for multiple platforms. You can either download it using the supported application store on your device or visit the Amazon official website to get the application. The app download is available for devices like computers, laptops, iOS Mac, Android, iPad, etc. All you have to do is make sure if you download the latest version of Alexa app to enjoy the services at its best. Now we are going to tell you the process to download the Alexa app for your device. Follow the below-mentioned guidelines and complete the process without any hassle.
You have to say wake word to make your Alexa app listen to your voice inputs. By default, the wake word is Alexa, but if you want you can change it from the settings menu. If you want to use Alexa services, you have to remember that Alexa only responds to the wake word. so do not forget to put the wake word because of your command. The Bottom Line Amazon Alexa app allows you to do a lot of things just with voice input. You can check on your train and bus tickets, get the latest news and weather forecast update, control the smart home devices, and a lot more. Alexa can also help you with the traffic situation by providing you real-time traffic updates and alternative best possible router. Alexa is just not a smart voice assistant, it's a lot more than that. So download the latest version of Alexa app today and enjoy using the Alexa services.  Amazon Alexa is among the top-most inventions that blow the mind of many people. You need to download the Alexa App to Access the Echo Device. It makes the lives of the people easy up to a great extent as it performs your many daily tasks with ease. The skills of Alexa makes it unique from others. It can do several things for you daily such as Play your favorite music, set alarms, and reminders, provide you the latest news, turn off or on Lights and fans, manage your daily shopping list, and much more. If you want help to install Alexa on PC, then contact the experts. You may also visit the official website of Amazon for more information.
Before Begin
Fabulous Steps to Install Alexa on PC It is easy to install the Alexa App on Windows PC. If you want to install the Alexa on PC, then follow the below-mentioned steps carefully and proceed:
 So, you have got a new Alexa enabled Echo Dot device and want to set it up? Well! Connecting the Echo to wifi is not a tough task, all you need is to follow simple steps and you can easily connect the Echo Dot to the internet. The first thing you need to make sure to get your device online is that you have an active Internet Connection. Also, before doing the setup, note down the name of your WiFi network and password and then you can proceed with the setup process. In this guide, we are going to tell you how to connect echo dot 3rd generation to wifi ? So, read the guide and follow the mentioned step to establish a successful wireless connection.
Before you proceed with the connectivity process, check and make sure that your Amazon Echo Dot 3rd Generation device is properly connected to the electric outlet and getting a proper power supply. You need to download the Alexa app on your smartphone. You can do this by using a supported app store on your device. Once you have downloaded the application, follow the steps:
When your Wi-Fi connection is successfully established on your Amazon Echo Dot device, you will get a message stating that you are online. So proceed with the above-mentioned steps and connect your Amazon Echo Dot 3rd Generation device to the Wi-Fi network. Troubleshooting tips If you have carefully followed the aforementioned instructions, then you would able to complete the Wi-Fi connectivity process for your Echo Dot 3rd Generation device. But, if you are still struggling to connect your device to the Wi-Fi, then there might be some problem with your device or wireless network. You can consider trying some troubleshooting tips to deal with this problem:
 Amazon Echo Dot is a virtual voice assistant device that works on your simple voice commands. Basically, it is a smart speaker device that has been designed by using the best techniques. You must download the Alexa App to access the Echo Dot as Alexa acts as its brain. Amazon Alexa holds the attention of many people because it can do many things for you every day such as Play your favorite music, set alarms, and reminders, provide you the latest weather news updates, control your all the smart home devices and a lot more. Though Amazon Echo Dot is famous for its mind-blowing performance, still people may face technical issues while using it. If you want help with Echo Dot Troubleshooting, then directly approach the experts. The team of experts will assist you more efficiently. You may also visit the official website of Amazon.
General Guiding Steps to fix the Amazon Echo Dot issues It is always advised to download the latest and compatible version of the Alexa App. Moreover, you must also update the Alexa App regularly. By updating Alexa most of the issues get resolved. It helps you to enjoy the advanced features of the Alexa. There are many problems that your Echo Device may face. If the problem is severe, then follow the below-mentioned troubleshooting steps to fix the issue: Echo Device not get turned on This is the most common problem that most of the people generally face while using the Amazon Echo Dot Device. To fix the issue, it is advised to check if the Power Plug is turned on or not. Also, check if the connections are proper. In case the connection is loose, it will create problems while using it. Unable to connect with WiFi Network Make sure that you have a good speed of the Internet connection. If the internet is weak, it will surely hinder the normal working of the Alexa Device. The Internet is the main requirement to access the Alexa device. If you face any issue related to WiFi Network, then you can restart the Router. It helps to resolve the issue instantly. Placement of the Echo device and Router If you are using the Echo Device, then it is important to keep the Echo Dot at the central location. Keep the Echo Dot device near to the Router. So, there will not be any Network Range issues. Reset the Echo Device If the problem still exists, in such a situation, you can simply Reset the Device. By resetting the device most of the issues get resolved. If your Alexa is unable to respond to your voice commands, then by resetting the device, this problem can be resolved. If you find yourself stuck while amazon echo dot troubleshooting, then contact the experts. We have professionals who are available 24/7 hours; feel free to contact us. The experts are known to most of the issues that you may face while using the Alexa device. We have a team of professionals who put all their efforts to meet the exact demands of the customers. They are well-certified and trained in their respective fields. You can choose our technicians and get satisfactory services from us.  Alexa devices are very popular among customers worldwide. The device has become the inevitable part of your day-to-day router. With Alexa, you can do a lot of smart tasks like managing the to-do list, control smart home devices, playing music and a lot more other stuff. To use the Alexa device, you need to download Alexa App for Windows 7. Both the Alexa device and application work hand in hand to share the best user experience with customers.
In this post, we are sharing the simple guidelines that will help you to download the Alexa app for Windows 7 devices. To proceed with the downloading process, follow the steps below:
 Amazon Echo devices are one of the trusted centerpieces of the household nowadays which means they have sensitive information stored in their memory bank. The Amazon Echo device gets several requests in a day. It holds sensitive details like credit card information, location data, and addresses. The device even saves the recording of all the commands that it has ever received. It doesn’t matter how useful your Echo device is, the time will come when you need to move to the other one and get a new device for you. At that time, what happened to the old one? You probably try to give it away. In that scenario, you do not want to leak your sensitive information to the third person. The best thing, you can just go for the Amazon Echo Dot Reset which will wipe out all the stored information and allow to begin for scratch. In this guide, we are going to share the simple instructions that will help you to perform to factory reset on your Echo Dot device.
The Amazon Echo Dot Reset process depends upon the version you are using:
Wrap Up Resetting the device will remove all the saved information from your Echo Dot and let the new user use it from scratch. The aforementioned instructions will let you complete the Amazon Echo Dot reset for the device. Follow the guidelines carefully to avoid any sort of hassle in the process and if you need expert advice, you can contact the technicians and seek their assistance.  Amazon Echo is a recent invention that grabs the attention of many people throughout the world. It can do many things for you every day such as play your favorite music, turn off and on lights and fans, set alarms and reminders, manage your shopping list and many more. Alexa is known for its remarkable performance still, people may face technical issues while using it. If you need help associated with Reset Echo Dot, then contact the experts. The team of professionals is providing excellent solutions to the customers, feel free to contact us.
To set up the Amazon Echo device, make sure you have a smooth and perfect internet connection. Download and install the Alexa from the Google Play Store or the official website of the Amazon Echo. You must download the latest as well as the compatible version of the Amazon Alexa. Steps to reset the Amazon Echo Reset the Amazon Echo is the best way to resolve most of the glitches that you may face while using the Echo. Here are the easy steps to reset the Amazon Echo device are as follows:
If you find yourself stuck while Amazon Echo Dot Reset, then directly contact the experts. We have experts who are providing 24/7 hour assistance to the customers, do not hesitate to contact us. Our professionals are highly experienced and trained to deal with the issues related to Alexa. We have technicians who are very dedicated to deal with the issues related to the Amazon Echo. Are you looking for help? Get a one-stop solution from us right now!  Alexa App has become the smart choice for many people. It’s amazing features and ability allow people to live a smart and easy life. You can do a number of things with the Alexa app for Echo which includes- playing music, set reminders, and alarms, latest news updates, controlling the smart home devices and a lot more. This smart virtual assistant device is easy to set up, carry, and use, all you need is to follow some setup instructions carefully.
Role of Alexa App For Echo Alexa app plays a very important role in the Echo devices. Echo is a smart speaker and Alexa is a speech software. Both of them work together to execute different smart tasks. The easy setup process lets users set up and use the Alexa app on their Echo device. Steps to follow for Alexa App for Echo Setup:
12/4/2019 Got a New Amazon Echo Show 5? Here is everything that you need to Setup Echo with ScreenRead Now Have you recently purchased a new Echo Show device? Well! The best part is that this smart speaker comes with a screen that allows the users to walk through to set up the device. You can also Setup Echo App for help to play music or turn on the lights and a lot more. While using the Echo Show, it is highly recommended to turn on the privacy shutter of cameras so you do not end up taking your pictures accidentally.
Here is all you need to know to keep the Echo device running: Things you will need - The initial setup will take around 5 minutes, but if there is any software update pending, it may take 15-20 minutes. While setting up your Echo Show device, check and make sure that you have the wireless network credentials and Amazon login details. Connect the Device and Get Started Once you plugin the Echo Show to the power outlet, the device will boot up and ask you to connect to the wireless network. The Echo Show 5 does not support the Ethernet Port, it only has the wifi option. Enter the wifi credentials and sign in to the Amazon account. After this, register the Amazon Echo 5 at amazon.com/code. Now, your device will share the code with you that you have to enter. Once your code gets accepted, you can proceed further and confirm the time zone. Now, let your device run and check if any update is available. Customize the Device Settings Using the Amazon Echo Show device connected with your Amazon account, you can manage the different settings of the Setup Echo App for your smartphone, or you can directly manage the settings on the device. You can check for the different Settings option on your Echo Show device. To go to the Settings app on Echo Show, swipe down and click on the ‘Settings’ icon. You can customize the different settings to manage the functioning of your device. To alter the settings, go to the Settings>> Home Screen>> Home Card Preferences for Echo Show. If you are using the Echo Show 5 device, you can select the Settings>>Home Clock>>Home Content and swipe toggle switch for turning off and on the content. If you want to change the theme settings, you can simply go to Settings>>Display>>Theme and change the background as per your choice ( Dark background with light text, and light background with dark text). For Echo Show 5, simply visit the Settings>>Home and Clock and select from the backgrounds for customization. Add Alexa Skills To make the best use of your Echo device, add skills to it. If you Setup Echo app and use it on your phone, you can add skills that can help you to control the smart home devices, manage a shopping list, listen to music and do a lot more things. You can also add the skills by visiting the official Amazon website. Now, your Echo Show device is set up. You are all set to use your smart device to enjoy the smart experience.  With Alexa’s calling and Messaging feature, a user can exchange the memos between the two Amazon Echo devices, this includes the Amazon Echo, Echo Dot, and Echo Tap. This feature works regardless of the distance. In this guide, we are going to discuss the simple steps that will help you in Setting Up Your Alexa Calling and Messaging feature.
The calling feature of Amazon Alexa includes the automatic transcription and recording and Skype-like conferencing. Also, the message recipients have access to the speech-to-text message readouts through the Alexa app for Android or iOS devices. However, these features may take time to work. Below, we are sharing everything that you need to know to begin with the Amazon Alexa Calling and Messaging: There are certain prerequisites of Amazon Calling and Messaging. First of all, you will require the Amazon Echo speaker along with the Android device or iOS device. You will also require a valid phone number. If you have not downloaded the Amazon Alexa app on your Android or iOS device then download the app now. If you are going to set up the Amazon Echo Speakers for the first time, follow the application’s step by step instructions for connecting the Amazon Echo speaker to the wireless network. Update the firmware and enabled features such as Bluetooth. Once you are done with it, get started with the Alexa Calling and Messaging:
That's All! You are successfully done with Setting Up Alexa Calling and Messaging. Follow the guidelines in the mentioned sequence to avoid the hassles. 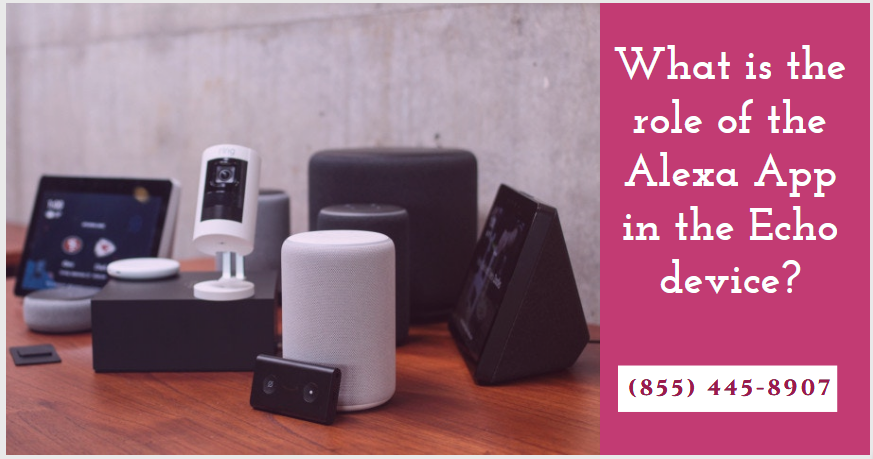 Amazon Alexa is the most effective innovation that helps to make the lives of people quite easily. It can do many things for you such as play your favorite music, turn off-on light & fans, set alarms & reminders, control your smart home, providing weather news updates, manage your shopping lists and many more. Although Alexa is excellent in performance, still people may face issues while using it. In that case, you may contact the experts for immediate help. If you want to know more about Amazon Alexa App Set up, you can contact the technicians for help.
You can access the Echo device with the help of the Alexa App. Initially, you must install the Alexa app to set the Echo device. Alexa App can be downloaded for Android, iOS, MAC or windows. Install the Echo device from the official website of Amazon Alexa. By simply adding the Alexa skills to the Alexa app helps to widen the scope of the Echo device. It makes your life extravagant up to a great extent. Steps to set up the Echo device with Alexa App
If you need help related to Amazon Alexa App Set up, then you may contact the experts for help. The team of experts is available 24/7 hours to help the customers. Our experts are very dedicated and passionate about their job; so you can freely share the queries with them connected to Alexa. We have experienced technicians who put their efforts to fix the issues. For instant tech support, you can choose us as we are providing complete satisfaction to the customers. All our trained technicians are offering easy guiding steps that are simple to understand and implement. Get the best support from us today! |
 RSS Feed
